Page 6 of 6 ... December 2012 - present
December 2012 - January 2013 -- Working on the Roof
Time to pick up where I left off last spring. I removed all of the aluminum molding around the windshield and rear window. Fortunately, I didn't find any major rust damage in the channel around the glass (a common area for rust on many cars). There is some surface rust in a few spots that I'll have to be sand blasted.
The plastic molding retainer clips are quite brittle and many of them are cracked so I picked up some new ones at NAPA. They're NAPA #6651434 and replace the original GM #9731301 clips.
A couple of "before" pics of the roof before I start stripping off the old paint:
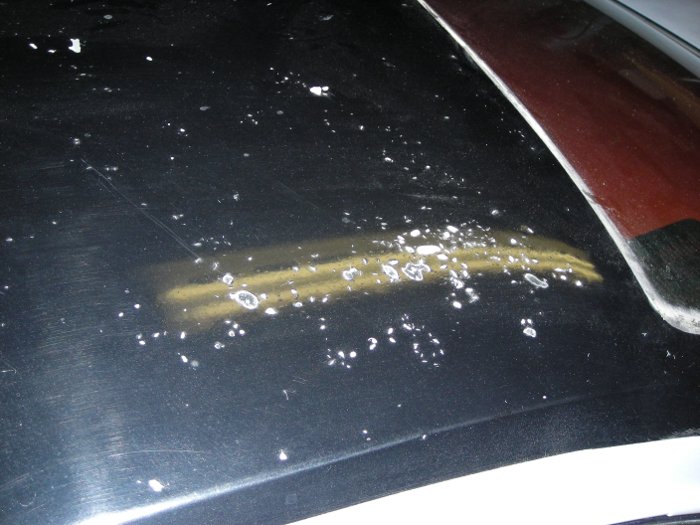
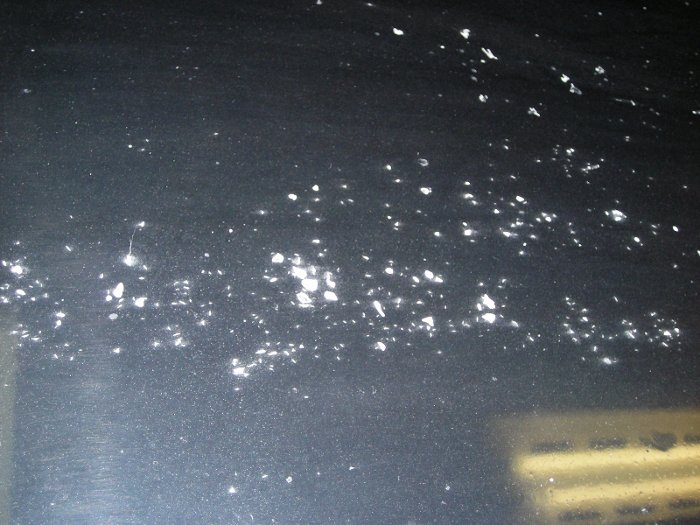
As I had mentioned earlier, the old black paint job evidently didn't have much sanding/prep work because the silver paint that's exposed in the spots where the black is peeling off is still somewhat shiny looking. On the plus side, it does make it relatively easy to peel off with a razor blade scraper.
April - June 2013 -- Finishing up the Roof and a new Windshield
After scraping the old black paint from the roof, I repaired a couple of small dents. Then I carefully removed the windshield and rear window. The rear window still had the original polysulfide sealer (I think that's what GM was using back then) along with the thin foam dam to keep the excess from squishing out on the inside. The windshield had been replaced before and had urethane sealer. I was able to cut through both of them with a urethane cut-out knife (basically a long handled utility knife) and remove the glass without breakage. The original rear window will be going back in the car but the windshield is peppered with numerous tiny stone chips/pits so that'll get replaced.
With the windshield and rear window out, I finished scraping the remains of the old sealer off the pinchweld. Most of the surface rust is located at the lower/outer corners where the factory seam sealer failed. There is also a little bit of surface rust around some of the clip studs and a few spots on the outer corner where the paint chipped off. I bought a Zendex Speed Blaster with a Hot Spot recovery attachment to remove the surface rust from these areas. The Hot Spot attachment does a great job of keeping the blasting grit from flying everywhere. However, there were a few areas where I couldn't fit the attachment's rubber seals so I had to resort to covering things up and blasting without the recovery attachment.
After blasting the windshield and rear window pinch weld areas down to clean metal, I gave the whole roof (which I had sanded down earlier) a coat of epoxy primer to protect against rust. While the epoxy primer was still within it's recoat time window, I sprayed a few coats of 2K urethane primer on the roof and some silver base/clear paint around the window openings. I've heard that it's best to apply the new windshield urethane over just the epoxy primer (without a build-up of base/clear in between) so I masked off the edge of the pinchweld before painting. The upper part of the dash also got a fresh coat of flat firethorn red paint.
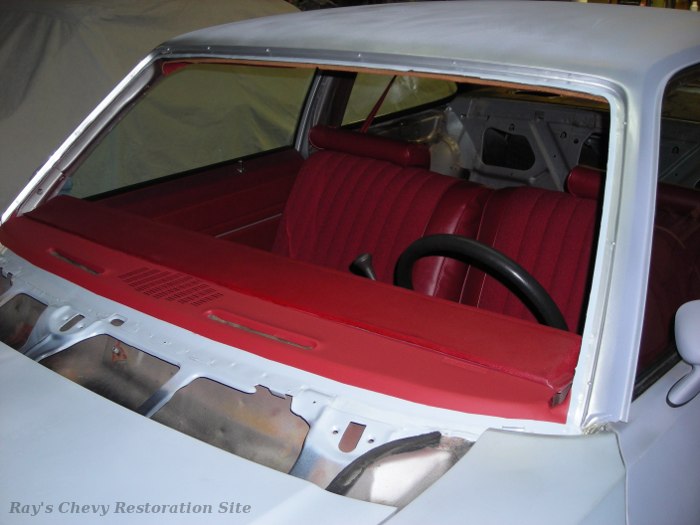
Having the windshield out was also a great opportunity to swap out the old cracked headliner. It's a 1-piece headliner that's made out of some sort of masonite type hardboard material. I probably could have repaired the cracks, but one of my parts cars had a nearly mint condition headliner that simply needed to be re-colored to match (it was tan). After carefully removing it from the parts car (I took the windshield out of that car too), I gave it a good cleaning and a light scuffing with a ScotchBrite pad. Then I sprayed it with a few coats of firethorn red SEM Color Coat.
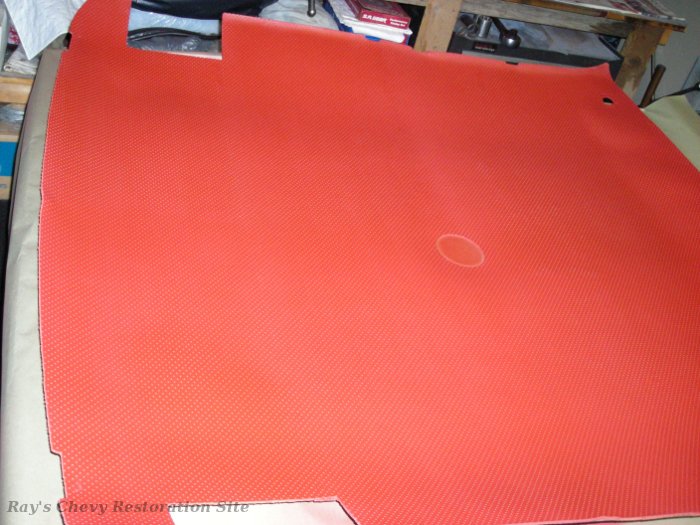
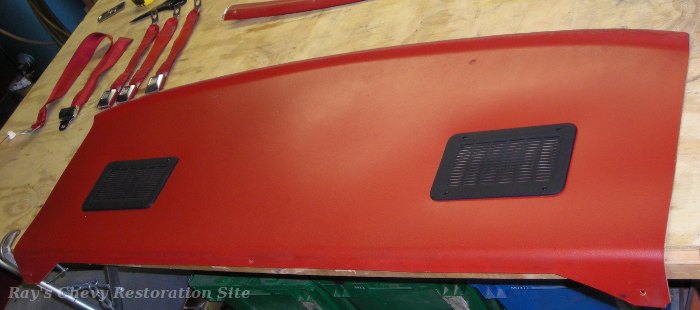
I also took the rear deck "package tray" out before removing the rear window. It too is made of a hardboard material similar to the headliner. These are often bowed and warped but this one was still in decent condition with the exception of the speaker grille areas and the finish being a bit worn and faded. Just like the headliner, a cleaning, scuffing, and some SEM Color Coat took care of the worn/faded finish. Years ago, I had already covered up the broken speaker areas with some old Radio Shack metal speaker grilles so I simply re-used them. Later on, I might buy a new plastic reproduction package tray, but this one looks pretty good for now.
June 2013 -- A new Stereo System
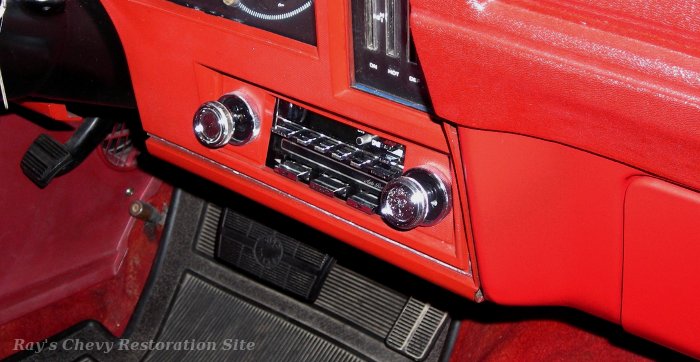
A previous owner had installed an aftermarket stereo from Radio Shack. It was a decent stereo that fit the opening without cutting up the instrument panel bezel. But the tiny black knobs and trim plate that covered the gap around the center opening just looked a bit out of place.
I decided to replace that aftermarket stereo with a GM/Delco unit. I got this ETR (electronically tuned receiver) from an 87 Chevy pickup truck. It fits right into the stock radio opening without any modifications. The faceplates on these ETR stereos are a bit larger than most but they're designed to fit behind the bezel (not stick through the center opening) so that didn't present a problem. I did have to swap the lower dash bezel mounting screws for some shorter ones. The originals stuck through too far and hit this stereo's larger case.
Luckily, I already had a good stash of original radio knobs, support brackets, and wiring connectors in my spare parts collection. So the rest of the install was a direct bolt-in, plug-in swap. It's connected to a pair of 4" speakers in the front that are mounted to a home-made adapter plate that fits in place of the stock 4" x 10" dash speaker. And in the back are a pair of 6" x 9" speakers mounted to the original locations in the package tray.
2014 - 2017 -- Not Much Progress
Work on the 77 has been rather slow again over these past few years due to other projects taking priority.
Some future fix-up/repair work will eventually involve:
- Finish up the bodywork (block sanding & additional priming).
- Re-paint the exterior back to the original GM #13 Silver Metallic.
- Replace bumpers with better ones I took off a parts car.
I've also added (or plan on adding) the following optional equipment that I've removed from my parts cars or purchased on eBay:
- D35 - Sport mirrors (from parts car, installed)
- UF7 - Econominder gauge package (bought on eBay, installed)
- N33 - Comfortilt steering column (from parts car, installed)
- U25 - Luggage compartment lamp (bought on eBay, installed)
- CD4 - Intermittent windshield wipers (bought non-working on eBay, repaired & installed)
- B96 - Wheel opening moldings (from parts car, will install after car is painted)
- C50 - Rear window defroster (from parts car, debating on whether or not to cut package tray to install this)
- UM6 - Delco ETR AM-FM Stereo with clock and auto-reverse cassette (from a 87 Chevy pickup truck) (installed)
- Return to Ray's Chevy Restoration Site Home Page
- © 1998 - 2026 Raymond McAvoy. All Rights Reserved.