Page 2 of 6 ... Summer 2002 - February 2003
Fall/Winter 2002 -- Engine/Trans Rebuild
Although the engine has been running okay, it has some noticible valvetrain "ticking" noise. A compression test showed low compression in cylinders #4 and #8. And the used TH350 transmission that I swapped in last summer to get the car back on the road slips a little in reverse. So I have decided to pull the engine/trans and rebuild them.
August - September 2002 -- Front Suspension Rebuild and Under-Hood Detailing
After pulling the engine, I took the opportunity to do some major cleaning in the engine compartment, paint the front subframe/suspension, and rebuild the suspension/steering with new bushings, ball joints, and such.
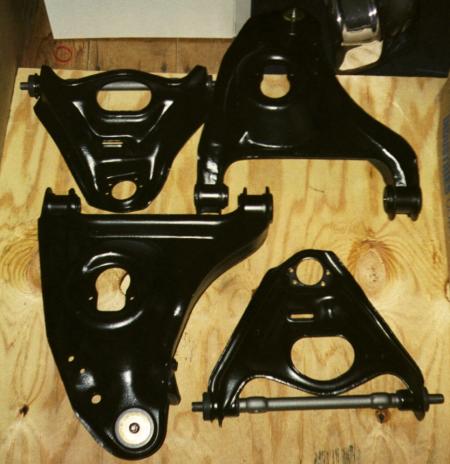
I pressed the old ball joints and bushings out of the upper and lower control arms before sand blasting them. Then I pressed the new bushings and ball joints in, masked them off, and painted the control arms with some semi-gloss black enamel.
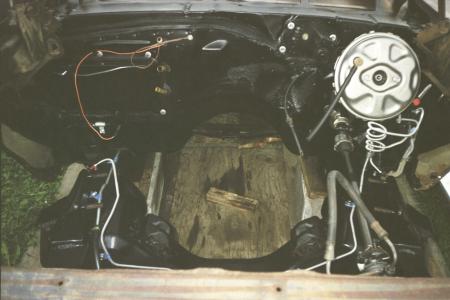
The cleaned and painted engine compartment.
Sometime in the past, a family of mice had taken up residence inside the car's heater box. Needless to say, the heater/defroster smelled terrible and didn't work very well due to the blocked air flow. So while I had the front-end apart I installed a heater box assembly from a parts car along with a new heater core and blower motor.
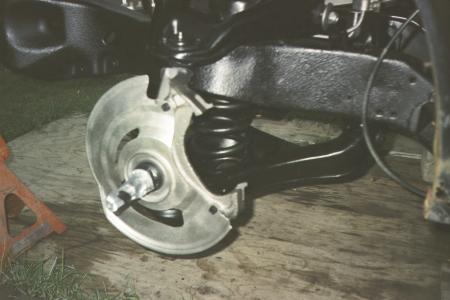
Putting the front suspension back together.
While I had the front end sheetmetal off, I noticed that the radiator support had some serious rust down where it attaches to the subframe. The radiator supports on my parts cars were all rusted as bad if not worse in the same areas. And a search of some local junk yards didn't turn up a beter one either. So I decided to repair the original one by cutting out the rusty sections and welding in homemade patches. The reinforcement brackets (at the mounting points) were severely rusted as well so I ended up fabricating new ones from pieces of heavy gauge sheetmetal. In order to form the compound curves, I made the reinforcement brackets in sections and welded them together.
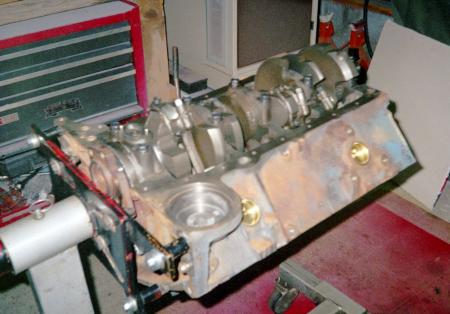
October - November 2002 -- Engine Teardown
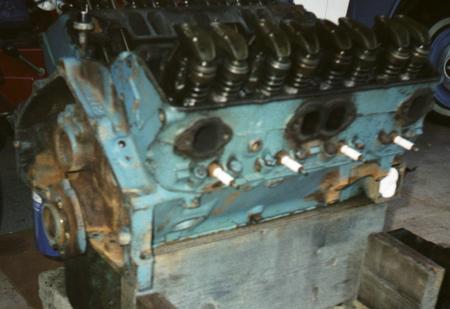
The original 305 has been adequate for a daily driver so I've decided to rebuild it rather than replace it with another engine. Here is the engine with the outside cleaned up and ready to tear apart. It still has lots of the original GM Corporate Blue paint left on it. GM started using this color part way into the 1977 model year, and as a result, some early 77's still had Chevy Orange engines. This one (dated April '77) was blue so I'll be re-painting it that color once I've finished the rebuild.
Upon tearing down the engine, I found:
- Stretched/sloppy timing chain (pretty much expected with 95,000 miles)
- Bad camshaft -- #4 and #8 exhaust lobes worn down (from what I hear, worn lobes were a common problem with many late 70's 305 cams)
- Worn valve guides and receeded seats on #4 and #8 exhaust valves (likely due to them running hot because the worn cam wasn't opening them much)
- Some cracks starting in the #4 exhaust valve
- Minimal cylinder wear (doesn't need to be bored oversize)
- Crankshaft in good condition but worn a little too much for standard size bearings
December 2002 -- Machine Work and New Parts
I sent the block, crank, and heads to a local machine shop for the following work:
- Everything cleaned and Magnafluxed (just to be on the safe side)
- Crankshaft ground 0.010" rods/0.010" mains
- New cam bearings installed in the block
- Inserts installed in all exhaust valve guides (the intake guides were still okay)
- Seat inserts installed to repair damaged #4 and #8 exhaust valve seats
I ordered the following parts from Northern Auto Parts:
- Re-ring kit with Hastings moly rings, Federal Mogul bearings, and Fel-Pro gaskets
- brass core plug kit
- Melling oil pump
- Melling double roller timing chain
- Sealed Power 1.5" exhaust valves and valve springs
I also ordered a stock replacement oil pan (SUM-G3500X) and a cam/lifter kit (SUM-K1101) from Summit Racing. With the exception of the Summit cam and a double roller timing chain, it will be pretty much a "stock-spec" rebuild.
January 2003 -- Engine Assembly
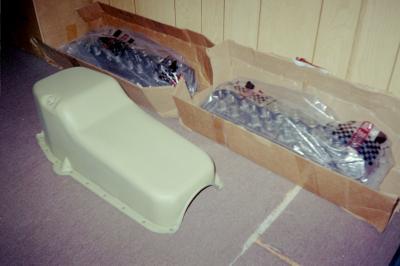
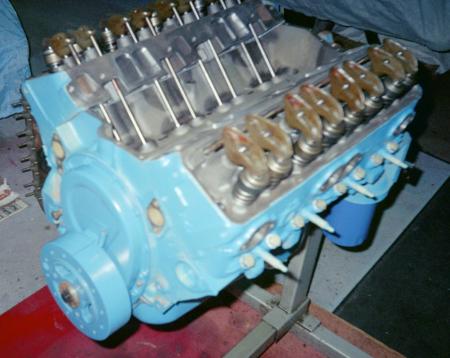
I've started re-assembling the engine. The cylinders didn't need to be bored oversize and the original pistons had minimal wear so I re-used them (thorough cleaning, new rings, and bearings of course).
Also shown here is the new Summit stock replacement style oil pan with a coat of DuPont VariPrime. The heads are in the background -- they still need re-assembly with the new valves and springs at this point.
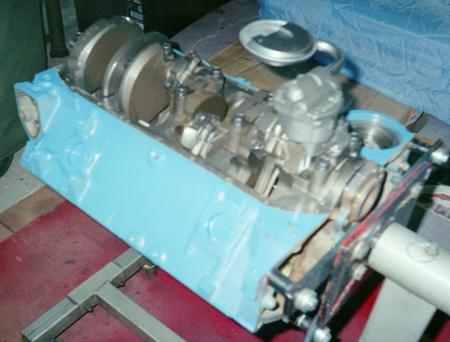
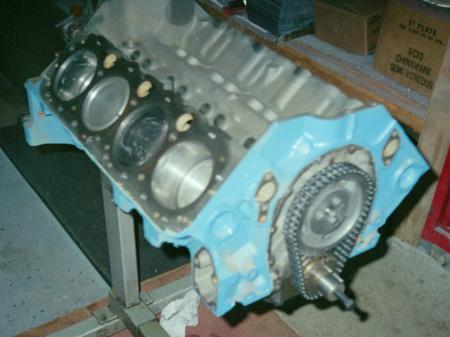
I sprayed the block with some VariPrime self etching primer followed by a first coat of Plasti-Kote GM Corporate Blue engine enamel. The oil pump, camshaft, and timing chain have all been installed as well.
February 2003 -- Engine Assembly Continues
Feb 9:
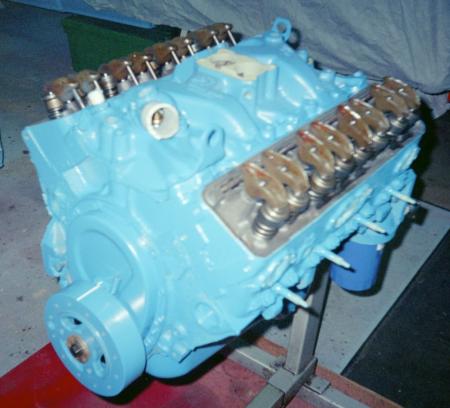
The heads, timing cover, harmonic damper, and intake are all back on now. It's full of oil and ready to prime before I re-install it in the car.
Feb 11:
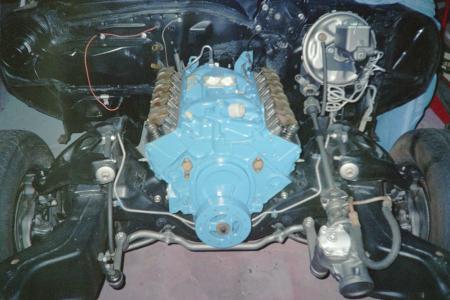
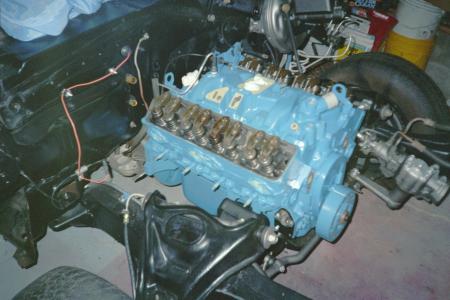
It's back in the car. At this point, I still need to hook up the wiring, exhaust, install the radiator support and radiator, and other parts before it'll be ready to fire up.
Feb 22: It's Alive!!
I fired it up today and all went well except for a couple minor incidents. First, the plastic loom covering the starter wires got a little too close to the exhaust manifold and started to melt. I tied the harness back to prevent further damage. The damage is limited to the loom covering so that won't be too difficult to replace. The other incident involved the muffler. When I shut it down after the 20 min. or so cam break-in, there was an ear-splitting backfire out the exhaust. The muffler case is now rather deformed looking :) No big loss ... it was just a cheap stock replacement type muffler that was on the car when I bought it. I'm guessing it was probably a combination of a slightly rich carburetor and retarded ignition timing that allowed some gas to build up in the exhaust system. While breaking in the cam, I did notice that the exhaust manifolds were starting to glow red so I advanced the timing a bit and took care of that but obviously the timing still isn't quite right. I'll adjust it with my timing light now that the cam break-in is finished and I can let the engine idle.
- Continue on to Page 3 (February 2003 - November 2003 ... Rust Repair and Other Miscellaneous Work)
- Skip to Page 4 (January 2004 - March 2005 ... Doors, Interior, and Rear Suspension/Axle)
- Skip to Page 5 (July 2005 - May 2012 ... Quarter Windows and Trunk)
- Skip to Page 6 (December 2012 - present ... Roof, Windshield, and more Interior work)
- Return to my 77 Nova Page
- Return to Ray's Chevy Restoration Site Home Page
- © 1998 - 2026 Raymond McAvoy. All Rights Reserved.