Page 3 of 3 ... 2006 - present
May 2006 -- Tachometer and Gauge Update
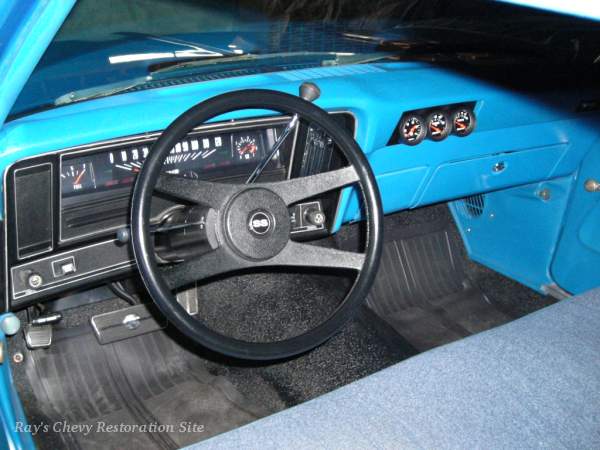
I decided to replace the old Sun tachometer that I used to have mounted on the steering column with one of ShiftWorks new in-dash tachometers. They mount in place of the clock (or clock delete plate in my case) and have a factory styled appearance.
I also updated the aftermarket gauge cluster I had hanging under the dash with some new AutoMeter gauges. I chose their Z-series gauges since they are a close match to the original instrument cluster with their red/orange pointers and white numbering on black faces. Rather than leave them hanging under the dash, I purchased a good used dash pad from a car that had factory AC and made a panel to mount them in the opening where the center AC vent was located. I first tried some plastic angle rings that tilt the gauges about 15 degrees but they still weren't enough to compensate for the tilt of the dash face and angle the gauges off towards the driver side for easier viewing. So I cut my own angle rings from some 2 ¼" OD exhaust pipe to tilt the gauges about 35 degrees.
June 2006 -- Back to an Original Radio
Years ago I added an older Pioneer AM/FM/cassette player but never really listened to it that much. So when I put the instrument panel back in after the tachometer/gauge upgrade, I decided to go back to an original radio. I used the Delco AM radio from the green 4-door parts car. The old Pioneer radio wasn't a perfect fit but at least I didn't have to cut the opening in the dash bezel (also from the 4-door parts car) to make it fit so there was no problem going back to an original radio. An aftermarket FM converter (mounted under the dash) does a good job of tuning in FM stations and playing them through the original AM radio.
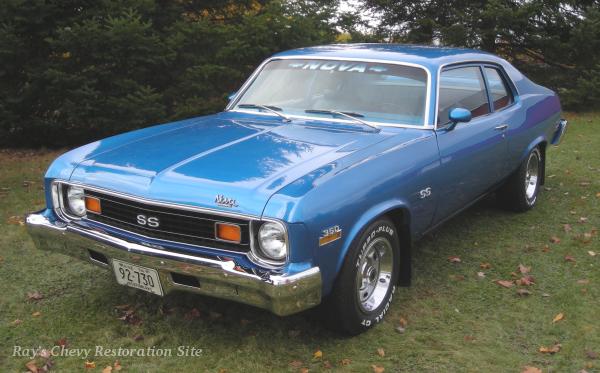
October 2007 -- An Updated Photo
April 2013 -- A new Speaker
The old original speaker in the dash quit working and none of the used ones I had were any better. So when ordering some new speakers for Dad's 63 Impala from SM Electro-Tech I decided to buy one for my Nova. They have the 4" x 10" special rectangle style speaker that fits perfectly in the dash using the original mounting bracket and has the correct 10 Ω impedance to work with the factory Delco radio.
February 2015 -- Gambling on eBay - Another Radio
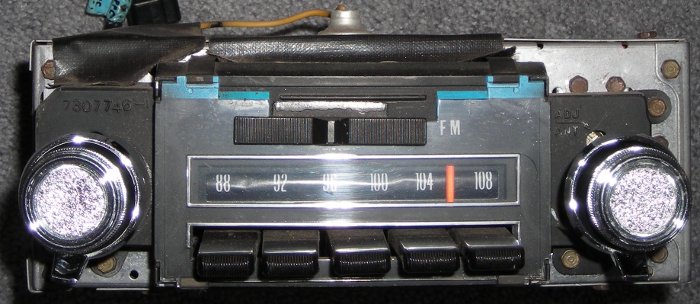
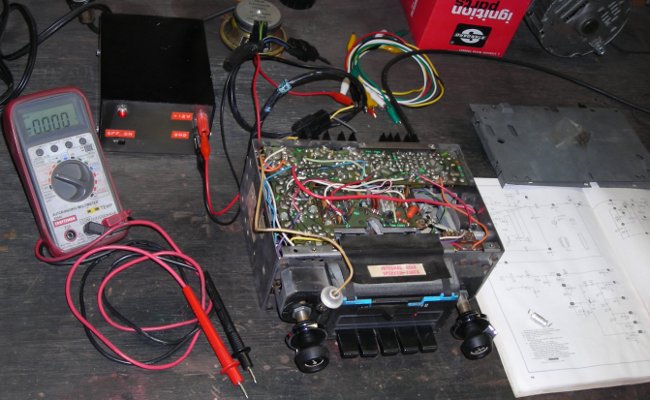
While searching on eBay one night, I came across a factory AM/FM radio from a 76 Nova that was priced considerably lower than most due to it being in non-working condition. Appearance wise, it looked very good and is nearly identical to the 74 version (a rectangular Delco logo on the inner part of the dial instead of a Delco script on the outer lens and different knobs were the only differences I could see). So I decided to buy it and see if I could fix it.
Having a schematic comes in handy when troubleshooting electronics so I did a search of this radio's service reference number (60XFPK1) on SAMS Technical Publishing website. That shows it listed in volume AR-191 but when I looked up a copy on eBay, it appears as though AR-191 covers model 75XFM1 instead. That's the 1975 stereo version and the radio I have is the mono version with an integral front/rear fader control. So I tried a search using the radio's FCC data model number (7933511-1) and that returned listings in SAMS AR-117, AR-127, and AR-189. Volume AR-189 covers the 1975 version of this radio (51XFPK1). I figured that would be close enough and spent $5 for used and somewhat musty smelling :) copy of that volume. As I had expected, the circuitry in the 75 & 76 radios is nearly identical with only some minor updates to the board layout.
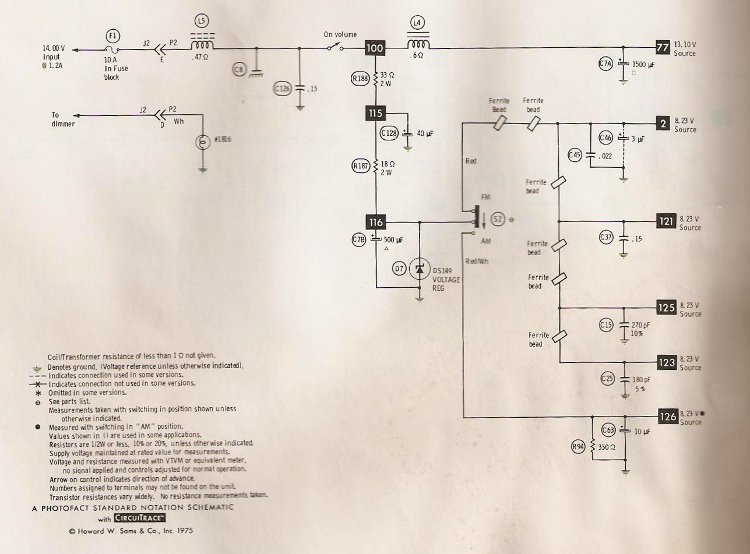
With the schematics from the SAMS manual (a portion of which is shown above), I was quickly able to determine that the radio's 8.23V power supply section was not operating correctly. A couple more voltage measurements narrowed the problem down to C128, a 40μF, 16V electrolytic capacitor. It had developed an internal short and was pulling point 115 in the circuit down to ground. Luckily, R188 was able to handle the extra current so the shorted capacitor didn't cause any additional damage. Simply replacing C128 with a new 47μF, 25V cap that I happened to have on hand got the radio working again. My gamble on the non-working radio paid off.
Looking back on it, I probably could have spent some time tracing out the circuit and found this problem without the schematic. But having it sure made the job easier and now I have a handy reference for any future troubleshooting & repair needs. Speaking of which, the other electrolytic capacitors in this radio appear to be originals. They're nearly 40 years old so I'll be replacing them as preventative maintenance before installing this radio in my Nova. I've also taken the opportunity to clean the volume, tone, and fader potentiometers with some Caig DeoxIT Fader F5 and swap to the 74 style knobs.
- Return to Ray's Chevy Restoration Site Home Page
- © 1998 - 2026 Raymond McAvoy. All Rights Reserved.