Page 8 of 8 ... October 2015 - present
September 2017 -- An Original AM/FM Radio
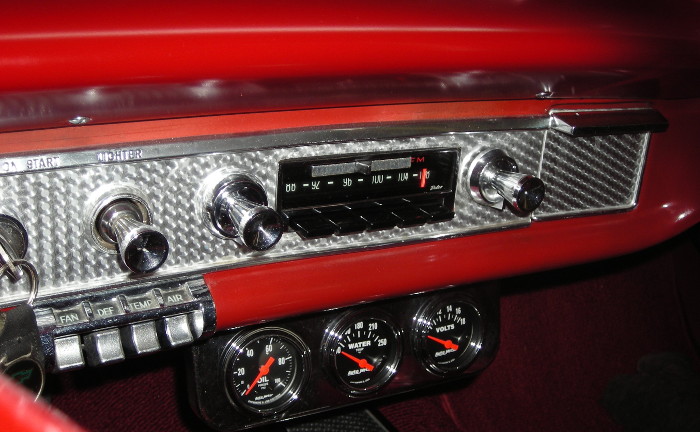
Dad had been wanting an original AM/FM radio to put in the 63 for quite some time. They're fairly rare but occasionally show up on eBay. Unfortunately, some of the examples I found were a bit rough looking with considerable pitting on the chrome face or other defects. And bidding on many of the nicer looking ones ended up going beyond what we felt comfortable spending on a used radio. But I finally scored a deal on a really nice clean Delco model 985877. I'm guessing the bidding stayed a bit lower than usual on this one since it was listed as non-working and missing the external output transistor / heatsink assembly. It also had an outer bezel / trim plate from a Corvair that made it appear a little different looking and that might have confused some potential bidders. In any case, it was one of the nicest looking 63/64 Chevy AM/FM radios that I had seen on eBay so I took a chance and bid on it even though it wasn't working. And I was pleasantly surprised when I won the auction for less than what I had been seeing the other examples selling for.
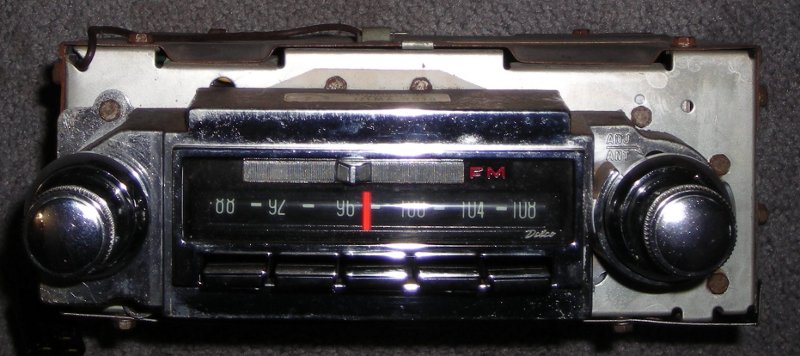
This model 985877 is correct for 1964 but will fit 1963 and (aside from the easily swapped knobs) looks identical from the front. The only difference is the externally mounted DS-501 output transistor / heatsink assembly and associated components & wiring. According to the service manual schematics, the Delco model 985694 AM/FM that is correct for 1963 had a capacitor and a few resistors externally mounted along with the output transistor. For 1964, those other components were moved inside the radio, leaving only the transistor on the external heatsink.
When I saw the listing for this radio on eBay, I had a feeling that the missing output transistor / heatsink assembly may be the only reason why it wasn't working. And sure enough, after winning the auction and receiving the radio, I hooked it up to a DS-501 transistor (that I salvaged from an old AM radio) and found out that it works!
I believe the output transistor / heatsink assembly was originally mounted to the speaker. But since we don't have the original assembly, I chose to make a homemade mounting bracket to attach the parts salvaged from the old AM radio to the back of this AM/FM radio. The case of the DS-501 transistor is it's collector (and output to the speaker) so it must be electrically insulated from ground. To accomplish that, I simply re-used the heatsink isolator & mounting hardware from the old AM radio to attach it to my homemade bracket. And to avoid drilling any extra holes in the AM/FM radio case, I made the bracket so it attaches to existing case screws.
March - May 2018 -- Re-Painting the Underside of the Hood
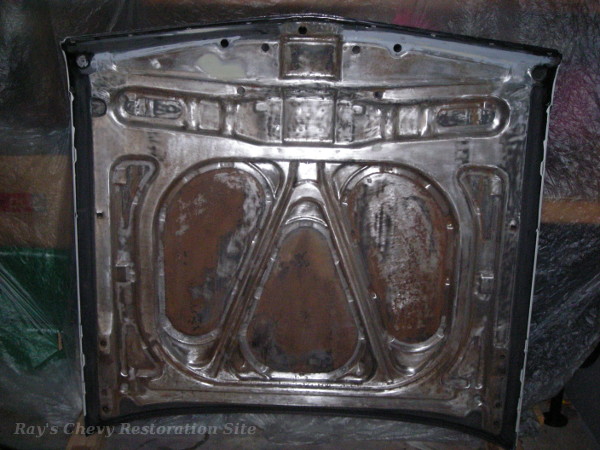
The underside of the hood had been painted semi-gloss black when the car was painted in 1999. But unfortunately the body shop didn't put a whole lot of time into prepping the surface so it had some rough spots and a few places that were peeling off. So I sanded it all back down in preparation to spray it again.
I didn't want to use any paint & rust removal methods that would potentially damage the white paint on the exterior of the hood. So I chose to remove the majority of the old paint (and surface rust underneath that hadn't been sanded off before) with a 3M paint & rust remover wheel in a power drill. However, there are a number of ridges, grooves, and nooks in the under-hood bracing that the 3M wheel couldn't reach into. So for those areas I used the Zendex Speed Blaster with Hot Spot recover attachment that I had bought several years ago. The Hot Spot recovery attachment did a good job of keeping most of the blasting media from getting in between the bracing & outer hood skin.
Since there was still some surface rust on the inaccessible areas between the bracing & outer hood skin, I picked up some Eastwood Internal Frame Coating and sprayed that into those areas. It's designed to neutralize & seal rust in areas that can't be reached with any type of rust removal tool so I figured it would be a good choice for this location. Finally, I sprayed the exposed underside of the hood with semi-gloss black Summit Racing Chassis Shield (same as I used on the radiator support, inner fenders, and other semi-gloss black parts in the engine compartment).
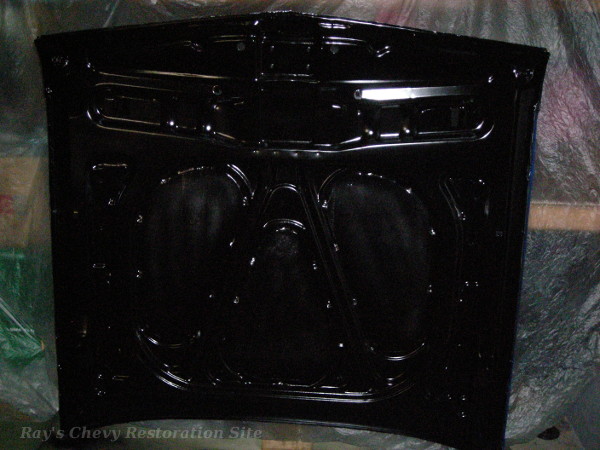
While preparing for paint, I noticed that most of the original isolation material that had been applied between the inner bracing & outer skin of the hood had fallen out. And the remaining dobs of material were rock hard and ready to fall out. So I finished removing the old stuff and then applied small dabs of 3M #08367 black urethane seam sealer to the areas where the original stuff had been (indicated by indentations in the inner bracing). Unlike the original stuff that had dried up rock hard, this 3M urethane sealer dries to a flexible rubber-like consistency that should help eliminate any rattles between the two layers. And finally, I used some 3M #08090 super trim adhesive to re-attach the fiberglass insulation pads to the underside of the hood before we bolted it back onto the car.

- Return to Ray's Chevy Restoration Site Home Page
- © 1998 - 2026 Raymond McAvoy. All Rights Reserved.