Page 5 of 6 ... March 2007 - July 2013
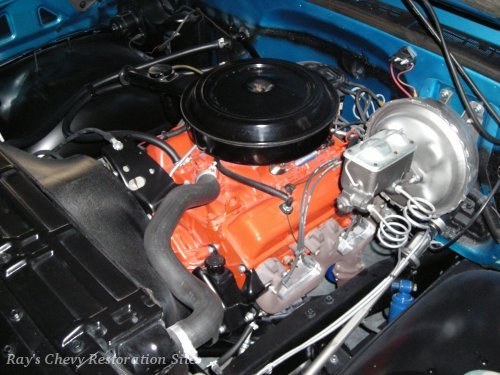
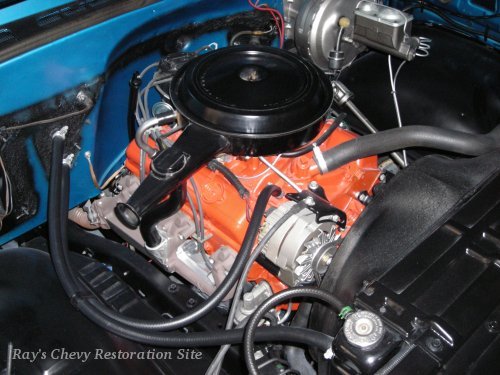
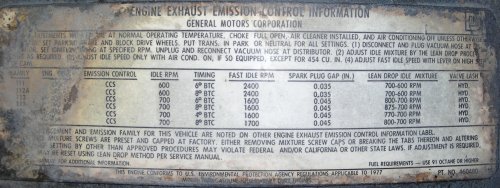
A couple more photos of the nearly finished engine and engine compartment. The only thing left is to freshen up the paint on the air cleaner and apply some reproduction decals for the jack instructions and engine emissions information. Finding reproductions for the emissions decals which were originally located on the air cleaner housing is proving to be rather difficult though. So far, I've only been able to find similar decals listed for a 78 454. These are the original decals for the 400:

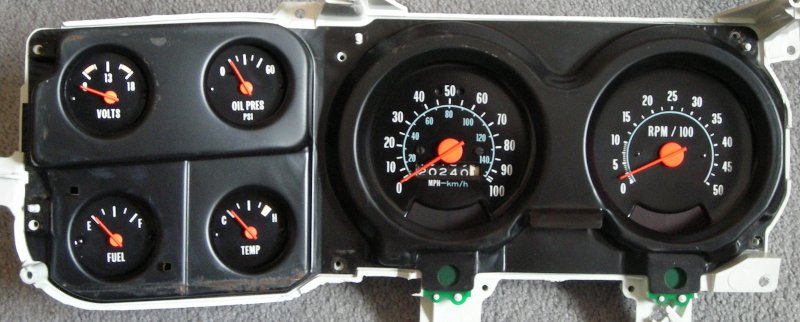
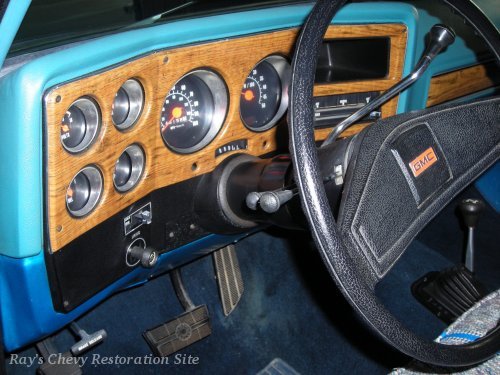
After a bit of searching, I found an instrument cluster with the factory tachometer option (RPO U16) to swap into Dad's 77. I located this one on the 1973-1987 Chevrolet & GMC Pickups Parts Board section of the 67-72chevytrucks.com site but have also seen them show up from time to time on eBay.
There were numerous different versions of these clusters used over the years. See my 1973 - 1987 GM Truck Instrument Cluster ID page for details. This particular one was chosen because it has a voltmeter and a mechanical oil pressure gauge, making it a direct plug-in swap for this truck which was already equipped with a similar RPO Z53 gauge cluster.
We also updated the radio with a Delco model 16034753 ETR (electronically tuned receiver) as pictured below. I believe these were originally available in '85 & '86 C/K series as well as '87 & '88 R/V series trucks, Suburban, and Blazer/Jimmy. They are a direct fit into the earlier year (as far back as '73) truck dash without any cutting. The wiring plugs are different for '73 - '77 but I already had some spare '78+ style connectors & speaker wiring harnesses in my stash of spare parts.
More information about original Delco radios can be found in my Chevrolet Radio Information guide.

Since this '77 was originally equipped with a mono AM radio, it only had a single speaker in the center of the dash. And that was in questionable condition. The ETR stereo has 4 speaker outputs, so the plan was to replace the single dash speaker with a pair of speakers in a homemade adapter plate and install a pair of 4" x 10" speakers on OEM mounting brackets in the cab corners.
Unfortunately, the OEM cab corner speaker mounting brackets (from a later 70's or 80's truck) won't fit in a '77 along with the original seatbelts. That's because the '77 seatbelts (a one-year-only design I believe) have the retractor reel for the shoulder belts mounted inside the cab corner where it interferes with the upper corner of the speaker brackets. So rather than change out the seatbelts for later model ones (that would work with the OE brackets), I decided to make some homemade brackets. The mounts I made accept more commonly available 6" x 9" speakers and mount similar to the OE ones, but are just a little bit lower to clear the seatbelt retractors. I still haven't mounted any new speakers in the dash yet so for now we're just using these rear speakers.
The original interior is still in decent condition but some areas do need some freshening up. Planned interior restoration work includes:
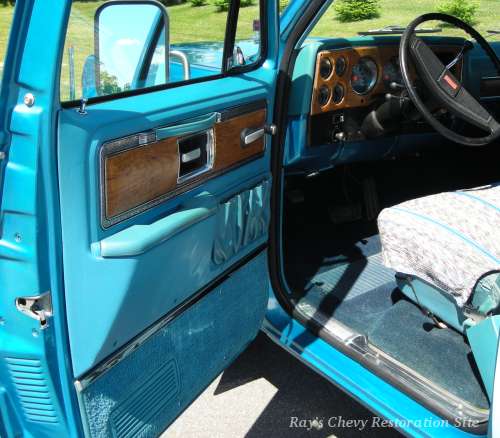
I used some SEM Color-Coat to recolor the faded door and kick panels. SEM didn't list this truck's interior color code (GM #25) in their color library but their technical support staff was very helpful. I mailed them a color sample and received a mixing formula within a week. I belive this particular shade of blue interior was only used in '77 and '78 GM trucks (other years had lighter or darker blues available). The formula they provided for this color is:
| SEM COLOR NO. | COLOR NAME | USED IN MIXING | CUMULATIVE GRAMS PER PINT | CUMULATIVE GRAMS PER QUART |
|---|---|---|---|---|
| 1554 | TINTING WHITE | 44.4 | 188.5 | 377.0 |
| 1553 | FAST BLUE | 28.5 | 309.5 | 619.0 |
| 1559 | YELLOW OXIDE | 20.3 | 395.7 | 791.4 |
| 1501 | LANDAU BLACK | 10.7 | 441.1 | 882.2 |
| TOTAL | 103.9 |
Shown below is a before and after photo of the driver side door panel that was refinished with the SEM Color Coat. The arm rests and map pockets were still in good condition and didn't appear to be faded too much so I didn't spray those pices. The carpet on the bottom of the doors is original un-dyed too.

Update: Since doing this, I have learned that USA1 Industries is now selling vinyl & plastic dye in the factory original colors for these trucks.
The paint job I sprayed on the truck last summer had a little bit of orange peel texture that I wasn't happy with. So I decided to do some sanding and buffing before installing the new trim and emblems. I wet sanded with 800 grit, followed by 1500, and finally 2000 to remove the orange peel and dust nibs. Then I buffed the paint with Meguiar's #1 Medium Cut Cleaner followed by their #2 Fine Cut Cleaner and finished up with their #9 Swirl Remover to restore the shine. This was my first time sanding & buffing a paint job so prior to doing the truck, I practiced on some junk panels first.
Most of the original trim that divided the two tone paint was in poor condition and was discarded when the truck was painted back in 1989. For 1977 only, GM used "ochre" (yellow / gold) accent stripes on the trim instead of black. I think it may have been an anniversary year for GM trucks or something. Anyway, Dad purchased many new pieces of trim from the local GM parts dealership years ago (pictured below) but had to get most of the pieces with the more common black stripes (used from 1973-76 & 78-80). I used some lacquer thinner to remove the black paint, spent a lot of time masking off the trim, and re-painted them with Nason Ful-Thane urethane in code 7863IB "Dodge/Chrysler Bahama Yellow" which is a very close match to the original ochre. The close-up photo below shows the lower tailgate piece (that we were able to find with the original yellow accent stripe) up against the lower bedside piece that I re-painted.


Note: At the time this was done, we avoided reproduction trim due to poor quality issues. However, Mar-K has since started reproducing high quality trim for these trucks (available with either black or yellow/gold accent stripes), eliminating the need to track down hard to find new old stock pieces and/or re-paint the stripes.
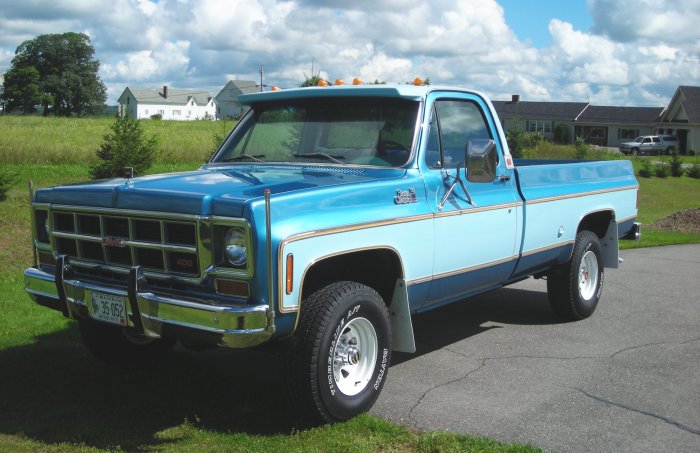
A couple photos of the finished truck with all the new trim and emblems.

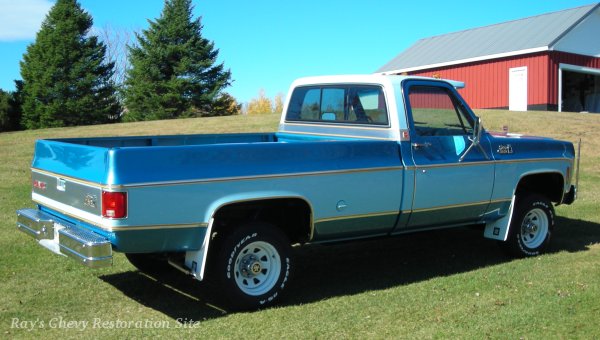
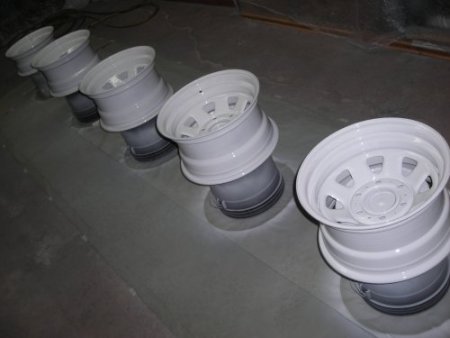
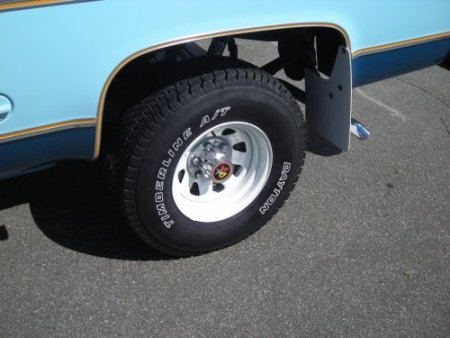
We took the old 235/75R15 Bandag retreaded GoodYear tires off the truck and replaced them with a set of 31x10.50R15 Dayton Timberline A/T tires. The old Bandags were great snow plow tires but very noisy on the road. While the tires were off, I took the opportunity to sandblast the wheels and spray them with some epoxy primer followed by some Nason Ful-Thane urethane in the original GM code 12 / WA5111 white (DuPont 817IBA). Although not original to this truck, these 15" x 8" wheels are a factory option (GM RPO-PA6). They can be distinguished from similar looking aftermarket wheels by the rounded/rolled edges of the triangular openings and the threaded center cap mounting holes.
After storing the truck for the winter, we removed the seat and took it to Bartman's Upholstery for repair. We plan on having them re-upholster it with original type vinyl on the sides and cloth on the seating area. Hopefully they can find a source for the original cloth. It's a ribbed pattern velour that (from what I've found) was only used in GM trucks for 2 or 3 years in the 70's.
After months of searching, Bartman's was not able to find a match for the original seat cloth. The closest they found was from SMS Auto Fabrics. It was an exact match on the pattern but the color was way off (and kind of green looking) as compared to an un-faded section of the original where the back/bottom overlap.
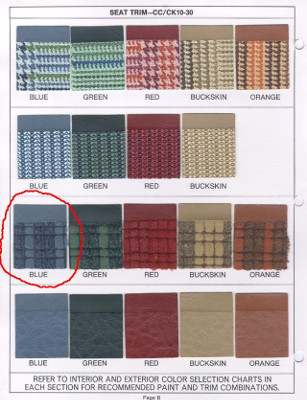
So we made the decision to to give up on trying to find an exact match and just go with some velour that we picked out from one of Bartman's sample books. The cloth we ended up choosing looks very similar to what GM used in some '78 & '79 trucks. In the meantime, we put the old aftermarket seat cover on a spare seat we pulled out of a parts truck and stuck that in there for the summer.
The seat is back from the upholstery shop and looks great even though the cloth isn't the exact original style. We also got a new carpet made by Auto Custom Carpets, Inc. that will be going in along with the seat. Their blue #802 cut pile carpet is a nearly perfect match to the original and matches the original lower door panel carpet a lot better than the darker blue replacement carpet currently in the truck.
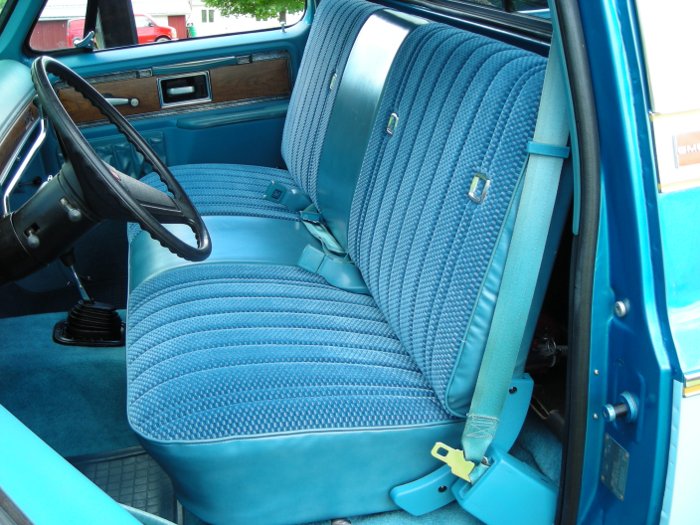
We finally got around to installing the new carpet and re-upholstered seat. I freshened up the faded plastic on the seat hinge covers and the seatbelt retractor covers with SEM Color Coat.