Page 4 of 6 ... October 2004 - September 2006
Aside from a few small rust holes along the front edge, the truck's original hood was in very good condition so we decided to repair rather than replace it. Additionally, we wanted to stay with the original 73-78 style hood. All of the replacements I have seen appear to be the 79-80 style with the extra style line across the front lip.
To repair this hood, I sandblasted the front edge to remove all of the rust from the outside and to help detect any areas that were getting rusted thin from the inside out. Then I welded up the holes and stood the hood up against the wall with the front edge down. I poured some silver POR15 down inside the front edge of the hood and tilted the hood side to side to help spread it around. Hopefully that will seal up any remaining rust that might have been in there. The rest of the hood just needed to be sanded down and primered.
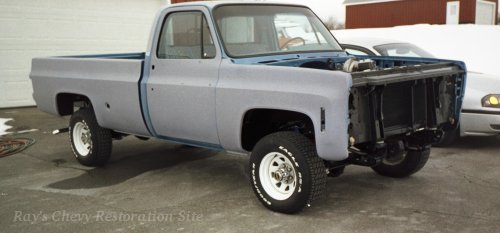
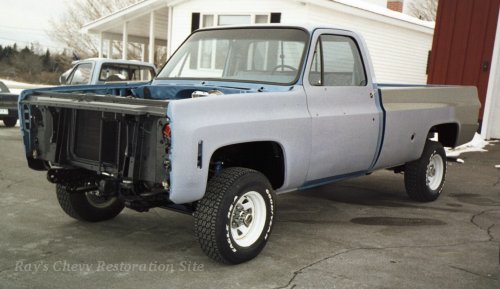
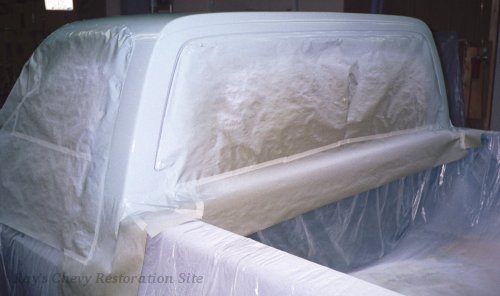
With the engine, drivetrain, and chassis detailing finished, we bolted the primered doors and fenders and hood back on. We also installed a new windshield and sliding rear window, both with new GM rubber gaskets. We left the chrome locking strips out for now to make it easier to lift the edge of the rubber for masking and painting around the window gaskets.
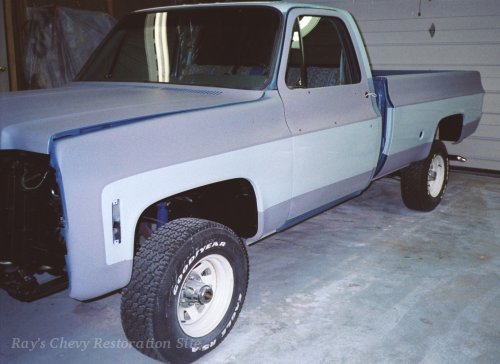
At this point, the truck was nearly ready for a new paint job. However, I don't like to run the garage furnace while painting so that will have to wait for warmer weather. In the meantime, we turned our attention to the 409 that will eventually be going in dad's 63 Impala.
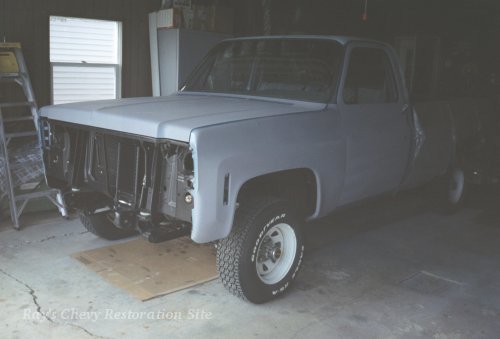
Dad and I were busy moving our auto repair business to a new location in town so I didn't get time to paint the 77 this summer.
I did find time to drill the holes in the body for the aluminum side trim that separates the two tone paint. As mentioned back on page 1, Dad had replaced the fenders, doors, & bedsides and had the truck painted back in 1989. The original side trim was in poor condition so it was not put back on the truck. And as a result, the holes were not drilled in the replacement body panels.
With the help of a few parts trucks, I was able to measure the hole locations and draw up a sketch.
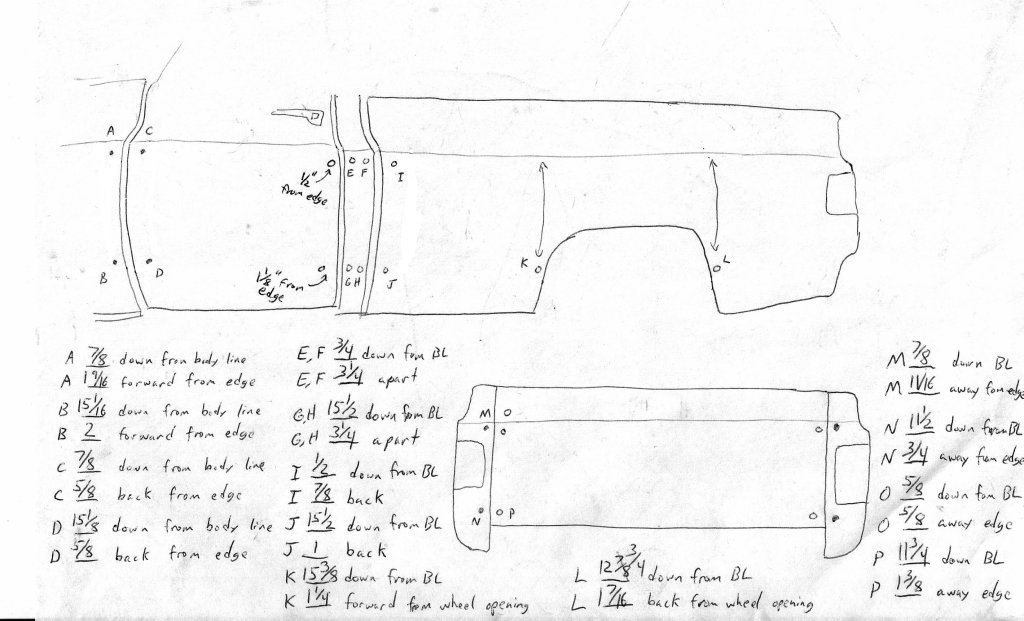
Note: "BL" on the sketch is an abbreviation for body line ... the style line that runs along the body panels. This sketch does not include all of the original holes. To reduce the number of holes drilled in the body panels, we decided to substitute additional factory type plastic stick-on clips in a number of locations that originally used metal stud/nut or snap-in type clips. These locations are primarily on the front fenders and near the rear of the bedsides. The front fenders do need 2 holes not shown on the sketch. These 2 holes should be located fore & aft of the wheel opening similar to holes K & L on the rear (use the trim as a guide for their location).
Also Note: Holes A, B, C, D, M, & N are small diameter holes for the trim screws that pass through the face of the trim. The horizontal location of these holes varies somewhat based on the trim pieces so I'd recommend using the trim as a template for marking out these holes. Holes I, J, & P accept snap-in type clips and if I remember correctly are about ⅜" diameter (check with your clips to be sure). The vertical location of these holes needs to be exactly center of the trim since making the hole oversize for adjustment would make for a loose fit with the snap-in type clips. The horizontal location isn't too critical since the clips can be slid side-to-side in the slot in the back of the trim. All other holes need to be large enough for a stud that's approximately ¼" diameter and they can be slightly oversize to allow for adjustment since these clips are retained using a nut on the back.
With the weather again too cold to paint, we spent some more time working on Dad's 409.
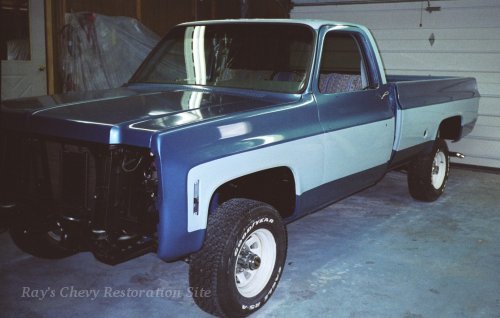
I painted the light blue on the top of the cab in late May, followed by the light blue on the sides in June. Then I finally got around to finishing the paint job with the dark blue in August.
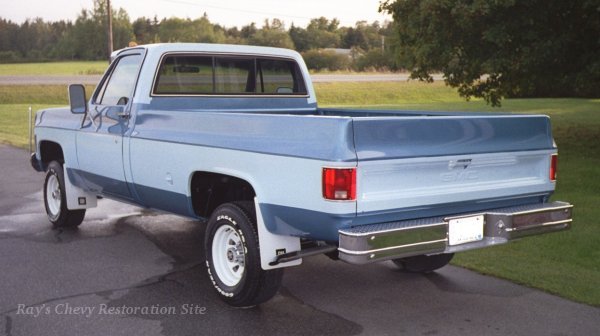
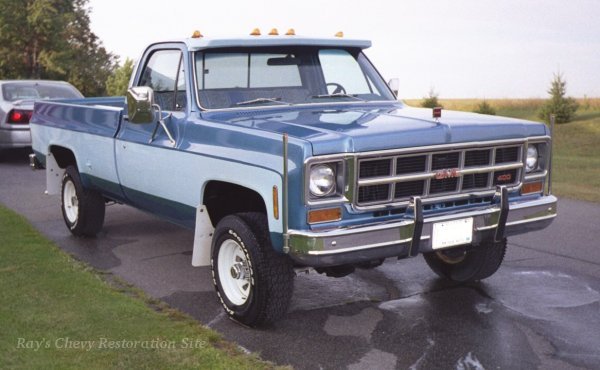
We re-installed the bumpers, grille, and other pieces. The bright aluminum trim that divides the two tone paint is still on the to-do list.